My card today is a "twofer"... as in two-for-one :) This is for today's LSC231 challenge on SCS which was to use only a die cut or punch for you main image (stamped sentiments or backgrounds only). It is also for today's Stampin' B challenge, which was to make a square baby card, using non-traditional baby colors (no pink or blue). This little fat headed baby die is the first Cuttlebug die I ever purchased, and it is still one of my favorites!
With the exception of the polka dotted paper (Colorbok) the other designer papers are form the Basic Grey Lemonade collection, which I purchased from Limelight Papercrafts. The finished size is 3 x 3", which I think is perfect for a gift enclosure.
Ingredients: Dies: Sizzix {Baby Sack}, Cuttlebug {Baby, Bottle}, Spellbinders {Circle, Scallop Circle}; Stamps: Stampin' Up! {Nursery Necessities}; Cardstock: Stampin' Up! {Blush Blossom, Tempting Turquoise, Creamy Caramel}; DP: Basic Grey {Lemonade Collection}, Colorbok; Ink: Stampin' Up! {Tempting Turquoise}; Accessories: Basic Grey button, May Arts Ribbon, White Gel Pen, Dimensionals, Prismacolor Pencils.


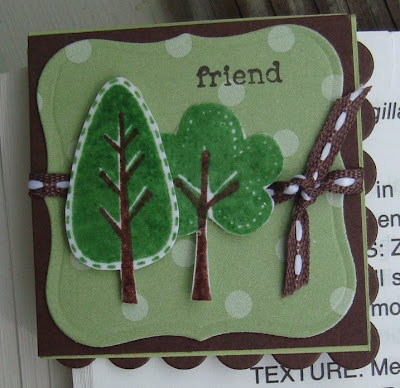 This is a page marker/bookmark, and it just slips over the corner of a book page to save your place. To make all you need to do is cut a piece of cardstock into a square (I made mine with a 4 x 4" piece of cardstock, but you can customize yours to any size). Score your square to make four equal quarters (on mine I scored at 2" on each side). Snip away one of the quarters with your scissors and use adhesive to secure the two ends together (to form the square). I used my Nesties to make scalloped edges by cutting a full scalloped square out (the one that was one size larger than my finished page marker), and then cut it on the diagonal and attached it to the inside of my marker.