

I was planning to save this project until Earth Day because it is all about re-purposing! But, I decided that we should re-purpose all year through (and most papercrafters do!), so here it is! This tutorial will show you how to take a card that has a sound mechanism and turn it into your own. Enjoy!
You will need:
-greeting card that plays music or sound
-cardstock
-ruler
-adhesive
-cutting tool
-embellishments
-Whimsie Doodles stamps
Step 1
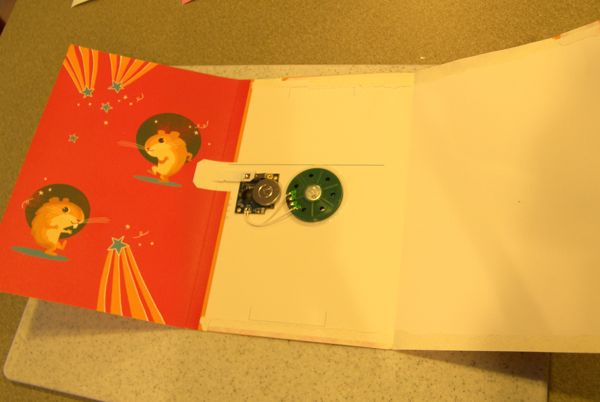
Open Card and remove the paper flap that covers the musical thingamajig.
(This photo shows what it looks like when you open the flap that covers the musical device, before you actually cut it off).
Step 2
I've decided to open my card from the top for a 4.5 x 5.5" card, and drew my cutting lines with marker for you to see. Now, draw your cutting lines as guides. Then using a paper cutter, craft knife or scissors, cut away the excess cardstock.


Step 3
Now cut cardstock to cover the inside of the card, being sure not to get adhesive, especially wet glue (trust me I know from experience!) onto the pieces of the musical device, and leaving the top flap of the new cardstock open. (So, you are only going to use adhesive on three sides of the cardstock when you apply it.) If you completely enclose the musical device, the music won't play! (This too, I know from experience!) It is also best to go ahead and stamp or write your sentiment now, as the musical device makes the inside card base a bit lumpy!

Step 4
Now decorate the outside of the card as you like, and you'll have your very own repurposed musical card! My card is playing The Hamster Dance as I type-- hee hee!

Oh, and to make the Sock Monkey look like he is holding on to the balloon's string, I punched a tiny hole at the top and bottom of his hand. The balloon is a punched oval that I used scissors to "pinch" in where it is tied and a scallop punched at the bottom.
Have a great day!


No comments:
Post a Comment