You know I like to show you all the quick and easy stuff and today's tutorial is no different! This is a gift card holder that is so fast and easy that you can make it in minutes.
Here is what you'll need:
One Envelope (I used the invitation size)
Stamps or Digistamps
Cardstock and Designer Paper (Optional)
Adhesive
Ribbon
Step 1:
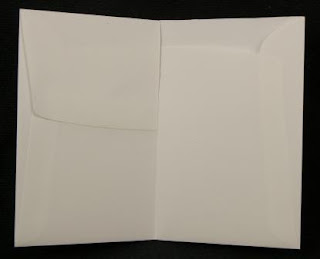
Fold your envelope in half, with the flap to the inside of the fold.
Step 2:
Cut the flap along the score mark, so that the flap is now in two parts.
Step 3:
Lick (or use adhesive) to adhere the left portion of the flap down to the envelope. Cut and remove the right portion of the flap.
Step 4:
Add ribbon for use as a closure if desired. Stamp and add embellishments to finish!
Easy peasy, right?
My project features one of our new Geishas, Miyako Tea.


8 comments:
This is SO clever!!! I'm gonna have to try this!
Nikki thanks for the great tutorial how fun, gotta give this a try!
Hi Nikki x that is so simple and so versatile x thanks for sharing x Leigh x
This is adorable, and just in time for those end-of-year teacher gifts! TFS!
What a SUPER idea - thanks for the tutorial and inspiration. Gotta go make some gift card holders now ....LOL Perfect for those Christmas card gifts. BRILLIANT
Lovely tutorial! Thansk for sharing!
Alice
What a cute idea, great tutorial too.
thanks for playing in the creatalicious challenge this month
WOW what a fabulous idea and such beautiful colours!!! Thanks for joining us at Creatalicious!!
xx
Post a Comment