Showing posts with label Scrapdoodles. Show all posts

Monday, September 26, 2011

Scrapdoodles Card Share

Happy Monday Everyone!
Scrapdoodles is stocked full of fun new papers and embellishments, and you can't help but be inspired once you walk in.  On that note, today I have three, fall-themed cards to share with you.
Ingredients: Stamps and Decorative Paper: Imaginisce {You Rule}; Copics; Cardstock: Bazzill: Red, White; Accessories: 3D Dots.
Ingredients: Stamps: Unity {Lollipop Tree U and Me}; Decorative Cardstock: Creative Imaginations {Samantha Walker}, American Crafts {Nightfall: Starry Night}; Copics; Ribbon: American Crafts; Accessories: Button, Twine, Glue Dots.


On this card, I created little spiders using the iTop brad punch.  I simply punched out the shape on black cardstock, and snipped two legs from each side (to make a total of eight on each spider), matted it on decorative paper, added googley eyes and added a string.
Ingredients: Decorative Cardstock and Paper Flowers: American Crafts {Nightfall: Night Watch, Halloween Night, Fall Leaves, Nightfall Spells}; Cardstock: Bazzill {Black}; Ribbon: American Crafts; Accessories: iTop Brad Punch, Twine, Googley Eyes.

Wednesday, May 18, 2011

It's What's on the Inside that Counts!

I'm all mixed up today...  I thought for sure that my day to post for Scrapdoodles but alas, the Mommy Brain strikes again :)  That just means more projects for you guys to see today though, so it all works out in the end!   Today's cards all feature a decorated "middle", which I often neglect.  It's not that I mean to neglect them, it is just that I spend so much time on the outside that I just leave it at that.  So my challenge to myself today was to do a little somethin' somethin' on the inside of all of my cards...

My first card features an Imaginisce Snag 'Em stamp (love those $1 goodies!) names Whale.  I thought it would make the perfect baby boy card.  I stamped the whale in brown on kraft cardstock and used my chalks to color him.  Then I added a few accents using a white gel pen (my old trusty assistant), and added some Glossy Accents to the water spray for some extra dimension.  (I also used the glossy accents to "glue" on the tiny yellow button). 
For the inside I used some alphabet stamps from my personal stash to spell out "congratulations", and stamped only the spray from the whale stamp, which I covered in glossy accents for a little extra.
Ingredients:  Stamps: Imaginisce {Whale}, personal stash; DP: Making Memories: Dilly Dally {Glitter Scallop Stripe}, SEI: On the Coast {Barnacle}; Cardstock: Kraft, White; Copic: Y02; Ink: Memento: Rich Cocoa; Accessories: Chalks, White Gel Pen, Scallop Edge Punch, Twine, May Arts Ribbon, Buttons, Inkessentials Glossy Accents, American Crafts: Chipboard Letters.

My next card features a beautiful 2 stamp mini set by Unity and Webster's Pages.  Since the image is so detailed, I decided to simply stamp it in black.  The inside is also simple in that I only stamped one of the butterflies in the corner.  I though this would make an excellent graduation card.

Ingredients: Stamps: unity and Webster's Pages {Dream Big}; Ink: Pallette {Noir Black}; Cardstock: Black, Kraft; Accessories: May Arts Ribbon.

My last card is very springy!  I also thought this would make a nice graduation card.  I love these colors, and when I saw the matching cardstock stickers and stamps by Jillibean Soup, I HAD to make something with them.  Oh and to change things up a bit, I put the sentiment on the outside and the image on the inside....  what do you think?  The butterflies on the outside are from one of my all time favorite Martha punches.  On the inside, the butterfly is colored with Copics and the trail is hand doodled.

Ingredients: Stamps: Jillibean Soup: Blossom Soup; DP: Jillibean Soup: Blossom Soup {Half Pound Blossoms}; Cardstock: Red, White; Sentiment: Jillibean Soup: Cardstock Stickers {Blossom Soup}; Copics: YG63, R59, R46, R27, R83, RV63, RV13, YG21, YR04; Accessories: Black Gel Pen, Martha Stewart Butterfly Punch, mini glue dots.

Wednesday, April 6, 2011

Scrapdoodles Day!

Today is my day to share my Scrapdoodles creations!  All three of my cards have small details to add dimension to an otherwise flat card.  My first card features a cling stamp from Stampendous called "Party Balloons".  I added a sentiment to the image by taking another stamp by Imaginisce, called "Take the Cake", cutting off the sentiment and clipping it in half.  I was then able to stack it on top of each other as you will see below.  To add dimension, I used "Glossy Accents" by Ink Essentials, and covered the balloons with it after I colored them with Copics and a gel pen.  Then I experimented by heating it with a heating tool, which kind-of sort-of worked, but not as well as leaving it for a couple of hours to dry completely.  The decorative paper is by Reminisce and is double sided (both shown).
 In this picture, you can see the glossy raised dimension that the glossy accents adds.
My second card features another cling stamp by Stampendous, called "Full Fluffles".  I colored him with Copics, and added accents with a white gel pen.  I added dimension to the cake icing by using Stickles.  The decorative paper is double sided and is made by Imaginisce.

My last card features an adorable Imaginisce Stamp from the Animal Crackers collection, called "Monkey".  The sentiment is one of the banners from the "Tres Elegant" mini stamp set from We Are Memory Makers.  I used two different double sided papers from Imaginisce.  One is from the Animal Crackers collection and the other is from the Princess collection.  To add dimension to this one I stamped the monkey image twice and colored one with Copics.  Next, I trimmed the colored image and stacked it on to the uncolored one using Quick Stick adhesive to attach it.  If you have never used a Quick Stick, you'd love it!  It is glue but with the consistency of gel ink and a ball point dispenser!  It is perfect for tiny details!

Thanks so much for stopping by!

Wednesday, March 2, 2011

It's ScRaPdOoDlEs Day!

It's my day to share some projects with you for Scrapdoodles!  I am in love with all of the new Cosmo Cricket and My Mind's Eye papers-- be sure to stop by there and check them out!

My first card features a Penny Black stamp called Party Animals...
I used Copics to color the image and these adorable banner stickers to add a festive sentiment.  The decorative papers I used are actually one double-sided sheet.  On one side it has the super cute candles and on the other it has a tone-on-tone birthday cake design on aqua paper.
Party Animals
Stamp: Penny Black (Party Animals); Designer Paper (Imaginisce: Birthday Bash-Wish Big); Bazzill Basics; Cardstock: Bazzill Basics; Stickers: Making Memories (Design Shop: Summer Birthday); Copics: R29, R59, YG61, YG63, N3, C4, E55, YR15, YG67, E23, YG25, E35, E25, E29, YG11, B04, B01, E31, YR18, Y21, E33, R05, E17, BG53; Other: White Gel Pen.

My next card is a paper-pieced card that started out as a tag.  I actually cut the sentiment off of the image stamp so that I could use them separately (one of the neat things about clear stamps).  The buttons are little poofs of exhaust behind the car...
Vroom
Stamp: Imaginisce (Snag 'Em: Let's Roll); Designer Papers: Cosmo Cricket (Joy Ride); Cardstock: Bazzill Basics; Buttons: Cosmo Cricket (Joy Ride); Sticker: Cosmo Cricket (Joy Ride); Other: Mini Brads, Pop Up Glue Dots.

My last card features another Imaginisce Snag 'Em stamp.  To make the sentiment I used a sticker from the Joy Ride sticker sheet, and then stamped "plane" on decorative paper (after I cut it away from the image stamp), and stamped the word sweet on decorative paper and hand trimmed them before adhering them to the cardstock strip.  I hand-doodled the dashes behind the plane with a black gel pen.
Plane Sweet
Stamp: Imaginisce (Let's Roll: Plane); Cardstock: Bazzill Basics, Decorative Paper: Cosmo Cricket (Joy Ride); Stickers: Cosmo Cricket (Joy Ride); Other: Copics, Circle Punch, Black Gel Pen.

Thank you so much for stopping by!  
I hope you find time to get creative today :)

Wednesday, January 19, 2011

It's Scrapdoodles Day!

Today is my day to feature some new projects for Scrapdoodles!  

My first card features the most adorable Magnolia image, called Little Mermaid.  When I started to color this image, my intent was to match it with this perfectly beachy cardstock, but I found that this little mermaid has a mind of her own :)  Once I colored her in these colors, I couldn't imagine her any other way!  Since I didn't have the perfectly matched cardstock, I made my own by coloring the edges of the purple matted piece with the same colors I used on her fin.  Then I cut strips of the embossed blue cardstock from Bazill Basics and inked the edges again with a Copic marker.  Then to blend it a bit, I used the colorless blender pen and the result looks like it was supposed to be that way...  oh how I love it when that happens!  I finished the card by making a medallion out of the same cardstock I used on the background.  This image is so amazing (and so much fun to color!!) that I wanted it to be the star of the show!
Here is a close up of my Copic coloring and the sparkly detail I added with Stickles.
What I used: Copic Markers, Bazill Basics Swiss Dot Embossed cardstock, white cardstock, Stardust Stickles, Fancy Pants Rusted Sun Buttons, sentiment from Unity Stamps, image from Magnolia, embroidery floss, glue dots and May Arts ribbon.

My next project started out as a birthday party favor and wound up as a gift for my sweetie this Valentine's Day!  I started with a button keeper jar from Doodlebug Design, that I filled with chocolate hearts.  Then I made a scalloped white border for a strip of adorable cupcake paper from Little Yellow Bicycle and attached it around the body of the jar.
Next I added a ribbon around the neck of the jar.  I made a sentiment tag by stamping the sentiment and then trimming around it and attaching it with a pearl corsage pin that I colored using a Copic.  I curled the end of the pin with needle nosed pliers so that it won't poke anyone!
I colored and cut out a cupcake image and adhered it to the top of the jar.  I added stickles to make it glittery, just like the cardstock.
 Here is the finished product....
 What I used: Copic markers, Stardust Stickles, white cardsotck, Little Yellow Bicycle cardstock (Cupcakes Galore with Glitter), May Arts ribbon, Doodlelicious Design button keeper jar, Unity stamps (I'll Always Love You).

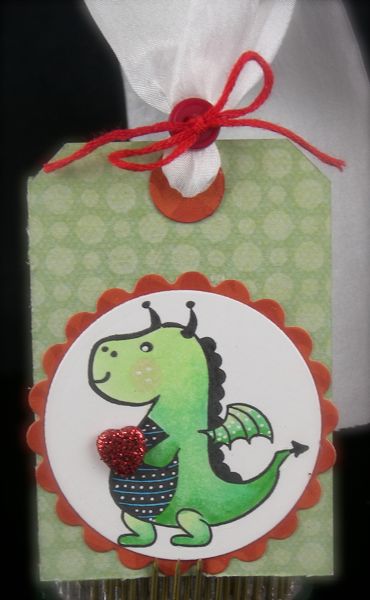
 My last project is a set of three tags that I was thinking would be fantastic to attach to treats for classmates or co-workers.


What I used: Copic markers, Imaginisce stamp: Enchanted Collection (Dragon), Fancy Pants Rusted Sun buttons, Cardstock: Fancy Pants: About a Girl (Brooklyn), My Mind's Eye (Be Loved), We R Memory Keepers: Be My Valentine (Together), white gel pen, embroidery floss, May Arts ribbon.

Tuesday, November 2, 2010

It's Beginning to Look a Lot Like Christmas!

Today is my day to show you some of the cute stamps that I have been lucky enough to work with from Scrapdoodles!  Since we got past Halloween this weekend, I thought it was high-time to get my Christmas MOJO in motion....

My first card features a beautiful image from Unity Stamp Company called "All Santa's Reindeer".  I simply stamped the image in black and used Copic markers to color it.
If you look closely, you can see that all the names of Santa's reindeer are part of the scroll design around his antlers...
Supplies:  Stamps: Unity Itty Bitty {All Santa's Reindeer}; Copics: E27, E57, E35, E33, E42, YG23, G07, R20, R21, RV13; Designer Paper: Imaginisce {Apple Cider paper pad}, Pebbles {Tree house Collection: Trunk}; Ribbon: American Crafts; Ink: Pallette Noir; Stickles: Stardust; Other: White Gel Pen, Nestabilities, Button, Twine, Solid Cardstocks: Olive, Ivory.
Finishes Size: 3.25 x 5.5".

My next projects are the perfect "little something" gifts to have on hand and can be filled with most anything!  All I did to make them was create a belly band using decorative cardstock and wrap it around a waxed paper treat bag.  I added a pre-made label sticker for the "to and from" portion and colored images with Copics to add a little extra festiveness!


Supplies:  Stamps: Imaginisce Snag 'Em Stamps {Reindeer}; Copics: YG23, YG25, R20, R21, RV13, R59, R46, R29, E57, E00, E27, E33, YG63; Decorative Paper: Imaginisce {Cottage Christmas: Peppermint Stick}; Sticker: October Afternoon Label Stickers {Very Merry}; Stickles: Stardust; Other: White Cardstock, White Gel Pen, 3D Dots.

  Supplies: Stamps: Imaginisce Snag 'Em Stamps {Santa Gnome}; Copics: YR01, YR82, Y18, R21, YG63, YG99, YG25, R59, R29, R46; Decorative Paper: Imaginisce {Cottage Christmas: Peppermint Stick}; Sticker: October Afternoon Label Stickers {Very Merry}; Stickles: Stardust; Other: White Cardstock, White Gel Pen, 3D Dots.

My next card also features an image and sentiment from Unity called "Merry and Bright".  It is one of their Itty Bitty Stamp sets and is oh-so-cute!  It would also make adorable gift tags!
To give the decorative cardstock a little dimension, I inked the edges lightly.  If you've never tried that on a card, you would be amazed at how much more finished it appears when you do!
I also made my own special ribbon by stamping the sentiment directly onto it...  I love to do that!
Supplies:  Stamps: Unity Itty Bitty {Merry and Bright}; Decorative Cardstock: My Mind's Eye {The Merry Days of Christmas: Santa's Forest}; Ribbon: May Arts; Stickles: Stardust; Other: White ad Olive Carstock, 3D Dots.

My last project is a simple wish list that got a fun 3D touch by adding a build-your-own snowman!  It is a little difficult to tell in the picture, but the snowman's nose is poking out...
Stamps: Basic Grey {Snowman}, Unity {Mitten Weather}; Copics; 3D dots; Stickles {Stardust}; White and Blue Cardstock.

Have a great day!  I hope my projects helped to get you in the Holiday Spirit!

Wednesday, August 18, 2010

I have BIG news!

I am sooooo  excited to announce that I have been chosen as a design team member for Scrapdoodles!  Scrapdoodles is located in Fredericksburg, Virginia, and has EVERYTHING you could ever want for card making and scrapbooking!  It's like heaven for a papercrafter and today I am sharing some projects i made using the goodies at Scrapdoodles!

All of my projects today feature rubber images from one of the newest Imaginisce lines, Apple Cider.  There isn't anything more perfect for fall!  When I color, I use mostly Copic Sketch markers, and often pair them with Prisma pencils blended with of all things...baby oil!  Sounds weird I know, but it smells good, and when you are coloring with pencils, it blends the lines beautifully. 

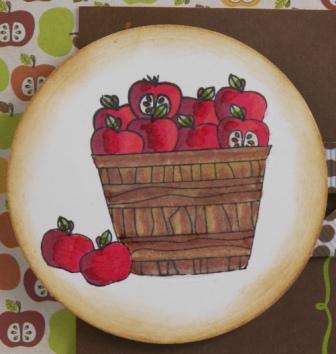
My first card features the Apple Snag 'Em Stamp.  Just because the image is small doesn't mean you have to make a tiny card (this one is the standard card size--4.25 x5.5") or that you can't use it as the main image on your project.  I colored the apples, leaves and basket using Copic Sketch markers.  The brown sentiment square is actually one of the 3 x 3 card blocks from the Peebles Tree House Collection.  I thought the colors were perfect for fall themed cards and proof that you do not have to have a million stamps in your arsenal to create cute cards.

Below there is a close up of the apples so that you can see the shading, and below that you will find all of the details of the other fun papers and embellishments I used.


Ingredients:  Stamps: Imaginisce {Apple Cider Collection: Apples}; Designer Paper: Imaginisce {Apple Cider Paper Pad}, Peebles {Tree House: 3x3 Cards and Trunk double sided}; Copic Sketch markers {R59, R27, R29, E30, E35, E27, E18}; Ink: Tim Holtz Distressing Ink {Vintage Photograph}; Ribbon: American Crafts; Buttons: Bazzill Stitchin' Buttons {Sugar Daddy}; Border Punch {Martha Stewart}; 3D dots.

This little card also features a new image from Imaginisce, Raccoon!  It was love at first sight when I saw this little guy :)  The green sentiment square is again one of the 3 x 3 blocks from the Peebles Tree House collection.  All I did was mat it with another patterned paper from Peebles, and actually cut out my colored image and applied it to the center of the square with 3 D dots to give him some dimension.  The finished sixe of this card is 4 x 4".

Ingredients: Stamps: Imaginisce {Apple Cider Collection: Raccoon}; Designer Paper: Peebles {Tree House: 3x3 Cards and Trunk double sided}; Copic Sketch markers {E29, E35, E25, E42, C4}; Prisma Pencils {Light Umber, Black}; Ink: Tim Holtz Distressing Ink {Vintage Photo} Buttons: Bazzill Stitchin' Buttons {Sugar Daddy}; 3D dots.

My last project today also features the adorable Raccoon, but on a tag.  I hand cut a tiny heart and attached it in between his hands with a 3D dot, as well as attaching the image itself with 3D dots.  Along the edge of the brown square I used a paper piercer to pierce the paper, and then a white gel pen to connect the dots for a faux sewn look.


Ingredients: Stamps: Imaginisce {Apple Cider Collection: Raccoon}; Designer Paper: Imaginisce {Apple Cider Paper Pad}, Peebles {Tree House: 3x3 Cards and Trunk double sided}; Copic Sketch markers {E29, E35, E25, E42, C4}; Ink: Tim Holtz Distressing Ink {Vintage Photograph}; 3D dots; white gel pen; Scrapdoodles ribbon by the foot.

Thank you so much for visiting today and I look forward to seeing you again soon!